PostgreSQL is a well-accepted, open source database system that is known for its robust features, standards compliance, and extensibility. PostgreSQL follows SQL standards and supports recursive queries, full-text searches, and geographic information system (GIS)-based geospatial queries for NoSQL data types, such as JSON, XML, and hstore, to meet complex data analysis requirements. PostgreSQL is widely used in Internet websites, enterprise-level application backends, data warehousing and analysis platforms, location-based applications, and complex data object processing. This topic describes how to build a primary/secondary PostgreSQL architecture on Elastic Compute Service (ECS) instances that run CentOS 7.x.
Before you begin
This topic is intended for Alibaba Cloud users who are familiar with ECS, Linux operating systems, and PostgreSQL.
Before you build a primary/secondary PostgreSQL architecture, create two ECS instances that meet the following requirements in a virtual private cloud (VPC). One ECS instance works as the primary node, and the other ECS instance works as the secondary node. For information about the parameters that are used to create an ECS instance, see Create an instance on the Custom Launch tab.
Operating system: PostgreSQL supports multiple operating system types. In this topic, CentOS 7.x is used.
Alibaba Cloud Linux 2 or 3 does not support the Yellowdog Updater Modified (YUM) repository-based installation method that is used in this topic. We recommend that you use the source code to install PostgreSQL. For information about how to install PostgreSQL on other operating systems, see PostgreSQL Downloads.
Instance type: The primary/secondary PostgreSQL architecture does not require specific instance types. You can select an instance type for the ECS instances based on your capacity and performance requirements and business growth expectations.
Public IP address: We recommend that you do not assign public IP addresses to the ECS instances but purchase elastic IP addresses (EIP) and associate the EIPs with the ECS instances based on the demand. Then, You can fine-tune the primary/secondary PostgreSQL architecture or upgrade its configurations based on your business requirements. For more information, see Apply for an EIP.
Security group: Inbound rules are added to a security group to which the ECS instances belong to open ports 80, 22, and 5432. For information about how to add an inbound security group rule, see Add a security group rule.
Step 1: Configure the PostgreSQL primary node
Connect to the ECS instance that is used as the PostgreSQL primary node.
For more information, see Connect to a Linux instance by using a password or key.
Install PostgreSQL.
Run the following command to add the official PostgreSQL YUM repository:
sudo yum install -y https://download.postgresql.org/pub/repos/yum/reporpms/EL-7-x86_64/pgdg-redhat-repo-latest.noarch.rpmRun the following command to install PostgreSQL:
sudo yum install -y postgresql15-serverNoteIn this example, PostgreSQL 15 is used. You can install an appropriate PostgreSQL version based on your business requirements.
Initialize PostgreSQL.
sudo /usr/pgsql-15/bin/postgresql-15-setup initdbThe following command output indicates that PostgreSQL is initialized.

Run the following commands in sequence to start PostgreSQL and enable PostgreSQL to automatically run on system startup:
sudo systemctl enable postgresql-15
sudo systemctl start postgresql-15
Create a database account named replica that you can use to replicate data between the primary and secondary nodes. Then, specify a password and configure logon and backup permissions for the account.
Run the following command to log on to PostgreSQL by using the postgres account:
sudo su - postgresIf
-bash-4.2$is displayed in the command output, you are logged on to PostgreSQL.
Run the following command to access the PostgreSQL interactive terminal:
psqlIf
postgres=#is displayed in the command output, you are accessing the PostgreSQL interactive terminal.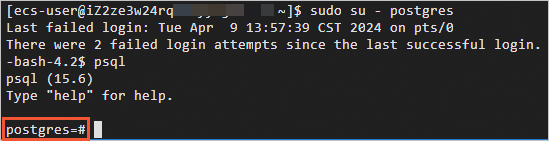
Execute the following SQL statement to specify a password for the
postgresaccount to enhance security:ALTER USER postgres WITH PASSWORD 'YourPassWord';Execute the following SQL statement to create a database account named replica, specify a password, and configure the logon and backup permissions for the account.
CREATE ROLE user login replication encrypted password 'YourPassWord';In this example, the password is set to
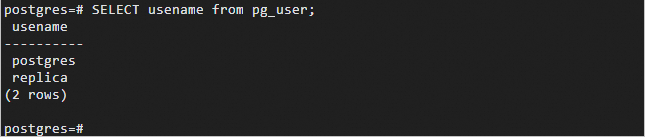
replica.CREATE ROLE replica login replication encrypted password 'replica';Execute the following SQL statement to check whether the database account is created:
SELECT usename from pg_user;The following results indicate that the account named replica is created:
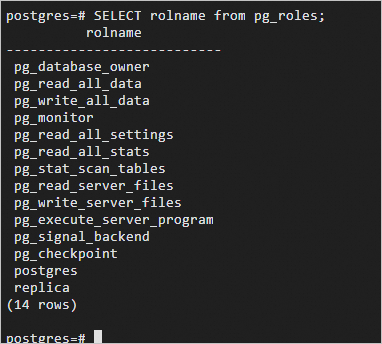
Execute the following SQL statement to check whether the permissions are configured:
SELECT rolname from pg_roles;The following results indicate that the permissions are configured:
Run the following command and press the
Enterkey to exit the PostgreSQL interactive terminal:\qRun the following command and press the
Enterkey to exit PostgreSQL:exit
Configure a whitelist for the replica account.
Run the following command to open the pg_hba.conf file:
sudo vim /var/lib/pgsql/15/data/pg_hba.confPress the
Ikey to enter Insert mode and add the following lines to theIPv4 local connectionssection, as shown in the following figure.host all all <VPC IPv4 CIDR block of the secondary node> md5 # Allow connections from the VPC IPv4 CIDR block of the secondary node by using MD5 password authentication. host replication replica <VPC IPv4 CIDR block of the secondary node> md5 # Allow users in the VPC IPv4 CIDR block of the secondary node to synchronize data.
Press the
Esckey, enter:wq, and then press theEnterkey to save and close the pg_hba.conf file.
Modify the postgresql.conf file.
Run the following command to open the postgresql.conf file:
sudo vim /var/lib/pgsql/15/data/postgresql.confFind and modify the following parameters:
listen_addresses = '*'   # Specify the IP addresses on which the server listens for connections from client applications.
max_connections = 100    # Specify the maximum number of connections. The value of the max_connections parameter for the secondary node must be greater than that for the primary node.
wal_level = replica      # Specifiy the level of information to be written into the write-ahead log (WAL). Default value: replica, which writes sufficient data to support WAL archiving and replication.
synchronous_commit = on  # Enable synchronization.
max_wal_senders = 32     # Specify the maximum number of synchronization processes.
wal_sender_timeout = 60s # Specify the timeout period for WAL replication.
Press the
Esckey, enter:wq, and then press theEnterkey to save and close the postgresql.conf file.
Restart PostgreSQL.
sudo systemctl restart postgresql-15
Step 2: Configure the PostgreSQL secondary node
Connect to the ECS instance that is used as the PostgreSQL secondary node.
For more information, see Connect to a Linux instance by using a password or key.
Install PostgreSQL.
Run the following command to add the official PostgreSQL YUM repository:
sudo yum install -y https://download.postgresql.org/pub/repos/yum/reporpms/EL-7-x86_64/pgdg-redhat-repo-latest.noarch.rpmRun the following command to install PostgreSQL:
sudo yum install -y postgresql15-serverNoteIn this example, PostgreSQL 15 is used. You can install an appropriate PostgreSQL version based on your business requirements.
Use the pg_basebackup utility to create a base backup of the primary node on the secondary node.
pg_basebackup -D /var/lib/pgsql/15/data -h <Public IP address of the primary node> -p 5432 -U replica -X stream -PAt the password prompt, enter the password for the primary node. The following command output indicates that data is synchronized.

Modify the postgresql.conf file of the secondary node.
Run the following command to open the postgresql.conf file:
sudo vim /var/lib/pgsql/15/data/postgresql.confFind and modify the following parameters:
primary_conninfo = 'host=<IP address of the primary node> port=5432 user=replica password=replica' # Specify a connection string to be used by the secondary node to connect to the primary node.
recovery_target_timeline = 'latest' # Synchronize the most recent data by using streaming replication.
max_connections = 1000             # Specify the maximum number of connections. The value of the max_connections parameter for the secondary node must be greater than that for the primary node.
hot_standby = on                   # Enable hot standby mode.
max_standby_streaming_delay = 30s  # Specify the maximum delay for streaming replication.
wal_receiver_status_interval = 1s  # Specify the maximum interval at which the secondary node reports its running status to the primary node.
hot_standby_feedback = on          # Allow the secondary node to send feedback to the primary node when errors occur during replication.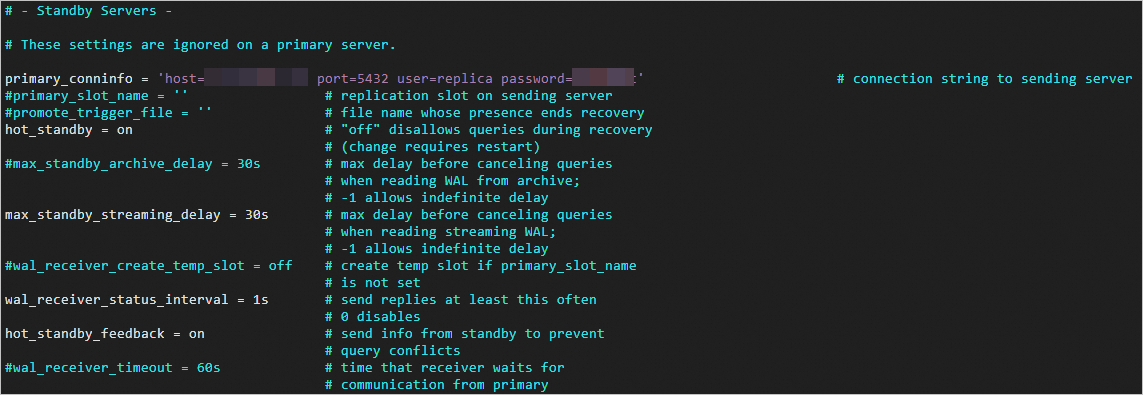
Press the
Esckey, enter:wq, and then press theEnterkey to save and close the postgresql.conf file.
Run the following command to change the group and owner of the data directory:
sudo chown -R postgres.postgres /var/lib/pgsql/15/dataRun the following commands in sequence to start PostgreSQL and enable PostgreSQL to automatically run on system startup:
sudo systemctl enable postgresql-15
sudo systemctl start postgresql-15
Step 3: Test the primary/secondary PostgreSQL architecture
To test the primary/secondary PostgreSQL architecture, make sure that data is exchanged between the primary and secondary nodes. For example, if you test the architecture when you run the following command to create a backup directory of the primary node, you can obtain the expected test result:
sudo pg_basebackup -D /var/lib/pgsql/15/data -h <IP address of the primary node> -p 5432 -U replica -X stream -PRun the following command on the primary node to check whether the sender process is available:
ps aux |grep senderThe following command output indicates that the sender process is available:
postgres 2916 0.0 0.3 340388 3220 ? Ss 15:38 0:00 postgres: walsender replica 192.168.**.**(49640) streaming 0/F01C1A8Run the following command on the secondary node to check whether the receiver process is available:
ps aux |grep receiverThe following command output indicates that the receiver process is available:
postgres 23284 0.0 0.3 387100 3444 ? Ss 16:04 0:00 postgres: walreceiver streaming 0/F01C1A8On the primary node, access the PostgreSQL interactive terminal and execute the following SQL statement to check the status of the secondary node.
Run the following command to log on to PostgreSQL by using the postgres account:
sudo su - postgresIf
-bash-4.2$is displayed in the command output, you are logged on to PostgreSQL.Run the following command to access the PostgreSQL interactive terminal:
psqlIf
postgres=#is displayed in the command output, you are accessing the PostgreSQL interactive terminal.Run the following command to check the status of the secondary node:
select * from pg_stat_replication;The following command output indicates that the status of the secondary node is displayed:
pid | usesysid | usename | application_name | client_addr | client_hostname | client_port | backend_start | backend_xmin | state | sent_location | write_locati
on | flush_location | replay_location | sync_priority | sync_state
------+----------+---------+------------------+---------------+-----------------+------------- +-------------------------------+--------------+-----------+---------------+-------------
---+----------------+-----------------+---------------+------------
2916 | 16393 | replica | walreceiver | 192.168.**.** | | 49640 | 2017-05-02 15:38:06.188988+08 | 1836 | streaming | 0/F01C0C8 | 0/F01C0C8
| 0/F01C0C8 | 0/F01C0C8 | 0 | async
(1 rows)
Run the following command and press the
Enterkey to exit the PostgreSQL interactive terminal:\qRun the following command and press the
Enterkey to exit PostgreSQL:exit